")
🎥 Click here to watch the video instead.
There is a way that you can save time creating teaching materials, whether it’s an interactive presentation, graphic organizer, story map, or anything in between.
Yes, I’m talking about Canva!
In this blog, I’m going to walk you through 3 actual classroom materials and show you how we used Canva to create them quickly and easily.
*Tip* Use Magic Write to Generate Content
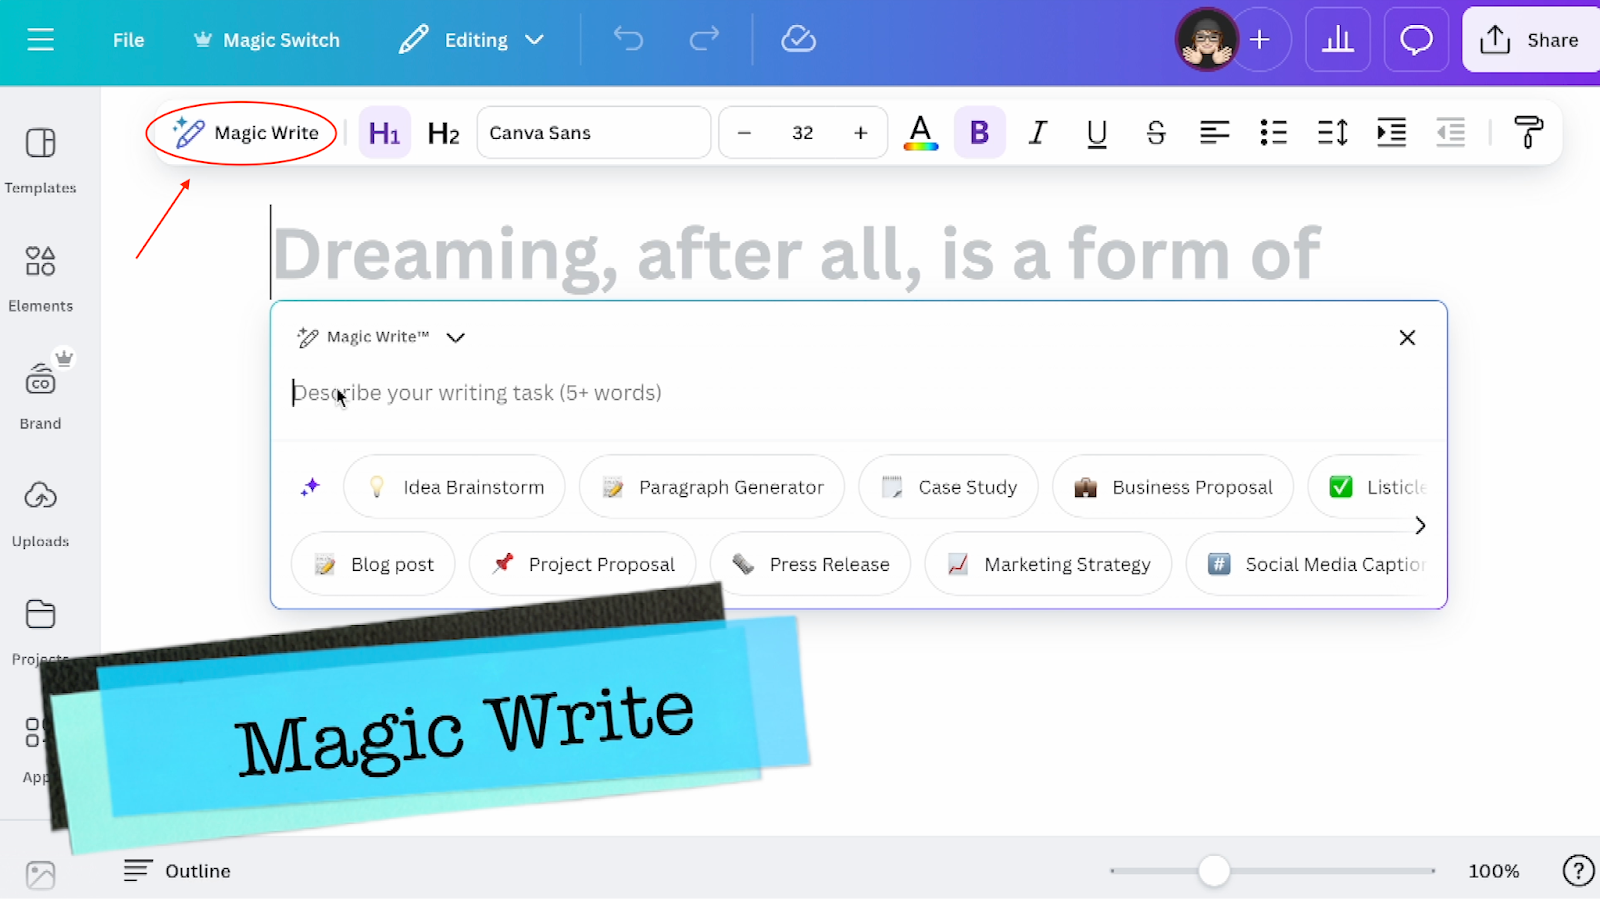
Before I jump into the three classroom material examples, we first have to talk about Magic Write inside of Canva and how it helps you create teaching materials in Canva more efficiently. If you’re not using it yet, you SHOULD be!
Magic Write is Canva’s AI-powered teaching assistant and it has the power to craft engaging content tailored to your student’s needs in seconds.
Here’s how to use it:
- Create a Document from the homepage in Canva and click on Magic Write in the top left corner.
- Enter a Prompt for any content or topic and make sure to be as specific as possible for the best results. Here’s an example of a specific prompt: “List ways to check students’ understanding of the stages of the water cycle for three different knowledge levels”
This is what Magic Write generated for me:
This is just one example of how you can use Magic Write. You can use it to create open-ended questions, engaging activities, lesson plans and so much more.
If you need help generating prompts or need some inspiration, click here to access a list of Magic Write prompts from Canva.
Teaching Material Example 1: Design a Presentation
I love to facilitate active learning and create teaching materials in Canva, especially engaging presentations.
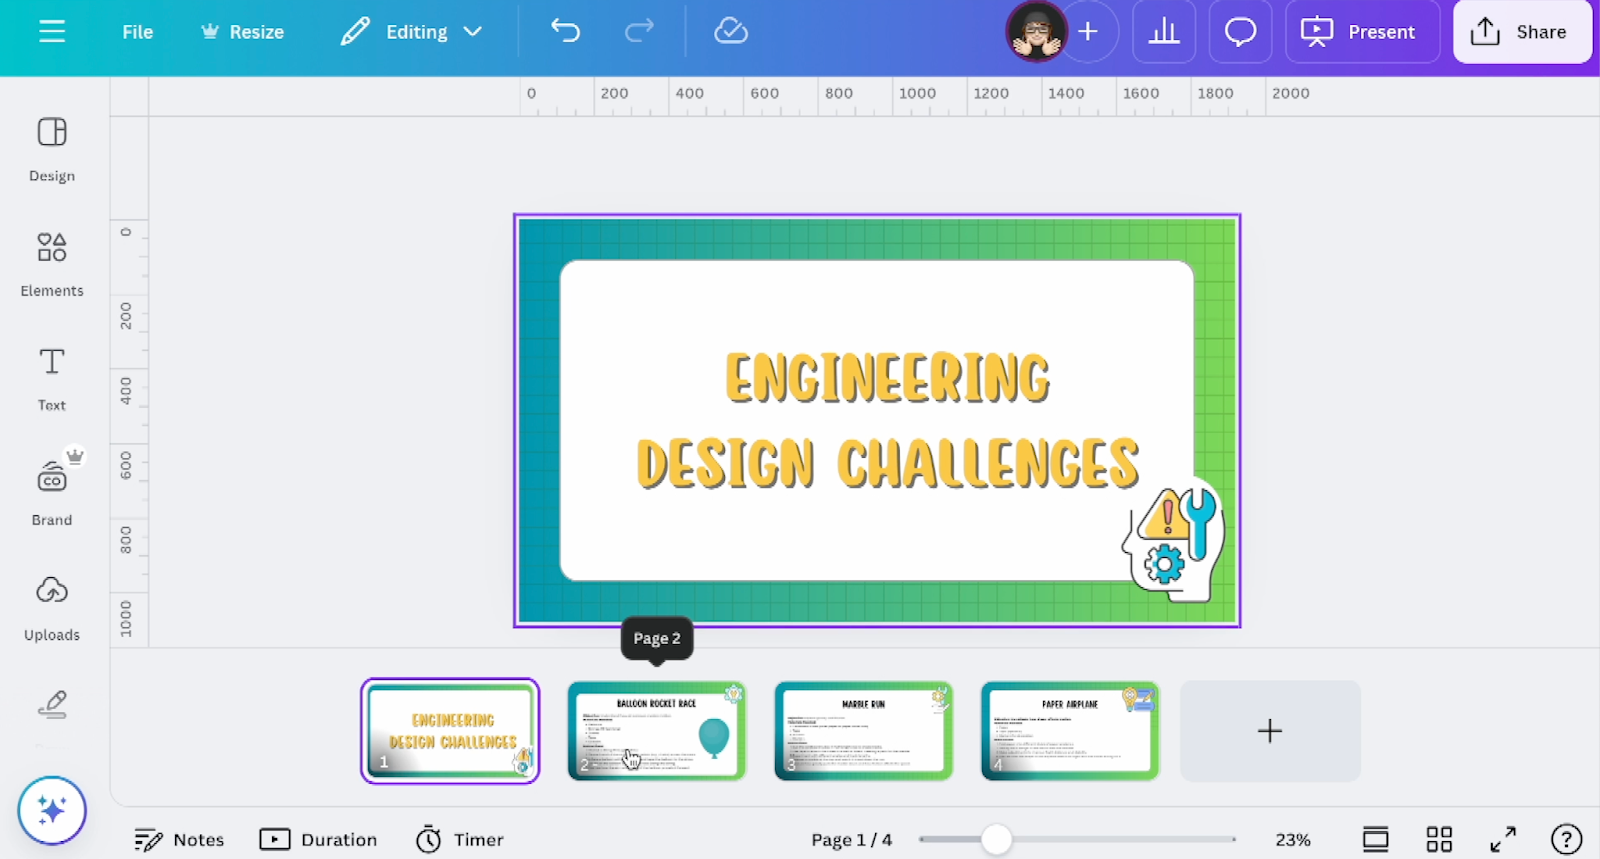
For this first example, I’m going to show you how I created a presentation to facilitate design challenges for second grade.
Step 1:
Let’s start with Magic Write! Inside a doc, I’m going to navigate to the top left corner and select Magic Write.
Here is the prompt I entered: “Please create five 2nd-grade engineering challenges focusing on force and motion.”
Within seconds, Canva generated excellent challenges that I could choose from.
Step 2:
I’m going to go ahead and copy the first challenge. Then, I’m going to navigate back to the homepage in Canva and select “Create a Design”. In the pop-up window, I’m going to click on “Presentations” in the left-hand menu and select a blank presentation from the top list of icons.

Canva has so many beautiful templates to choose from. Once I have my blank presentation open, I’m going to click on “Design” at the top of the left-hand toolbar and search for a specific template. I entered “Engineering Elementary” and it produced all of these templates for me to choose from.

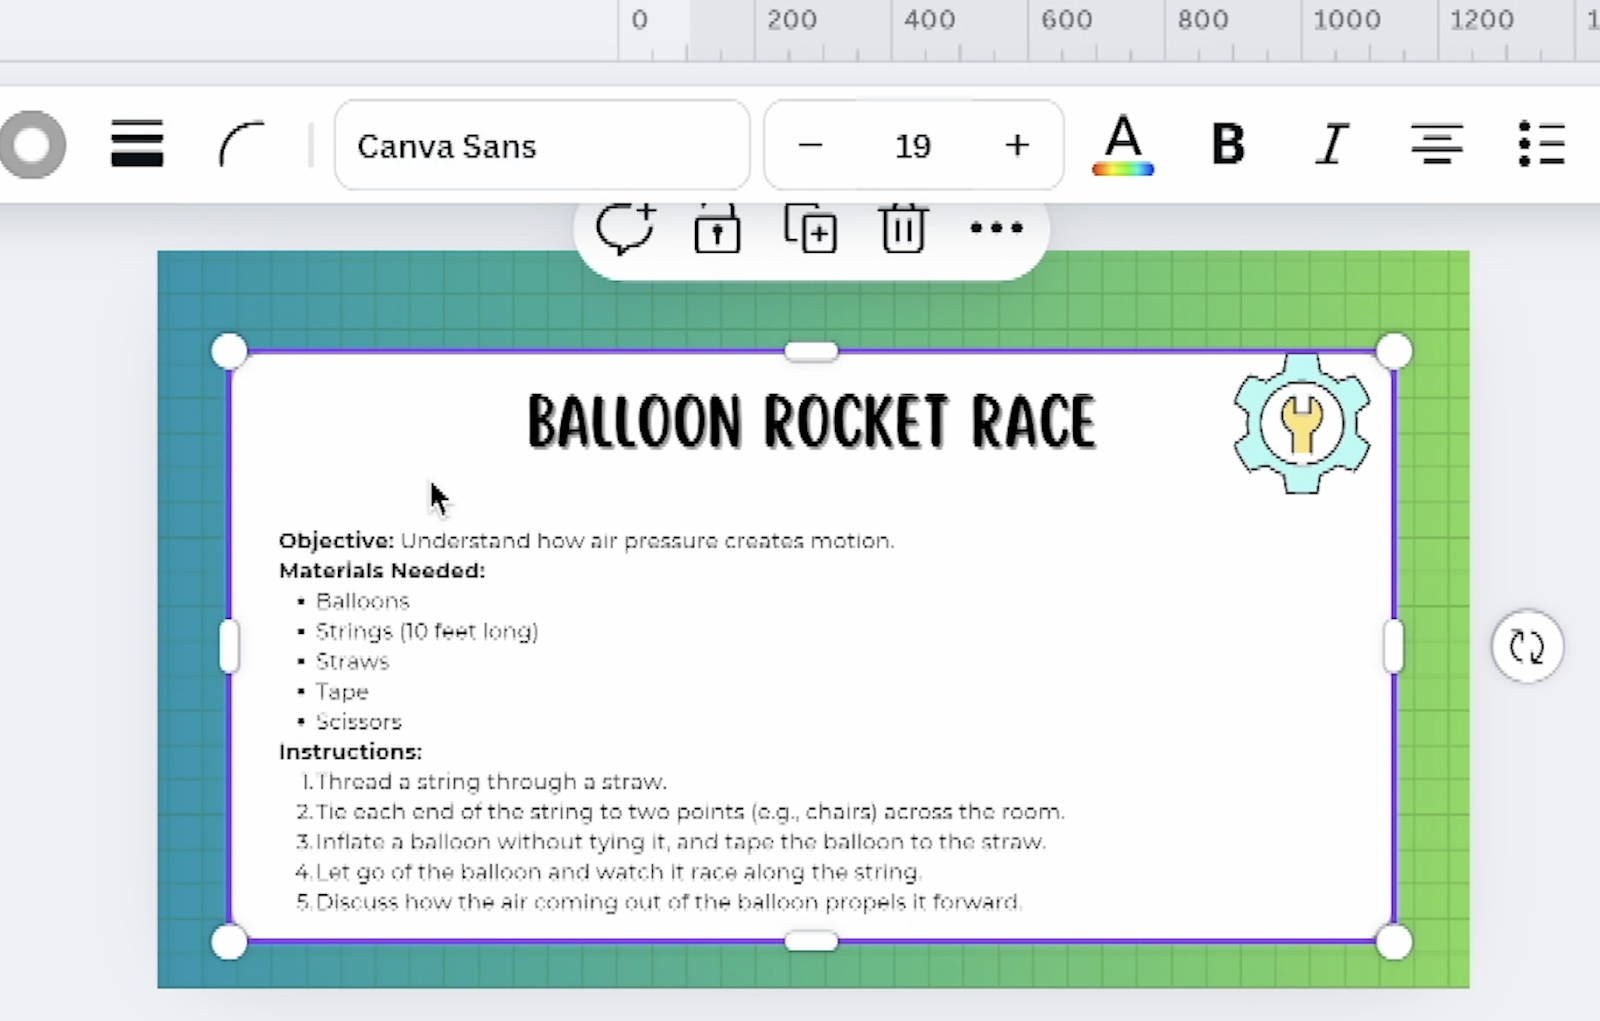
I’m going to go ahead and select the template that I like and apply it to all of the pages. Now I can begin customizing this. I can add in the challenge that I copied earlier and adjust the font and size.
Step 3:
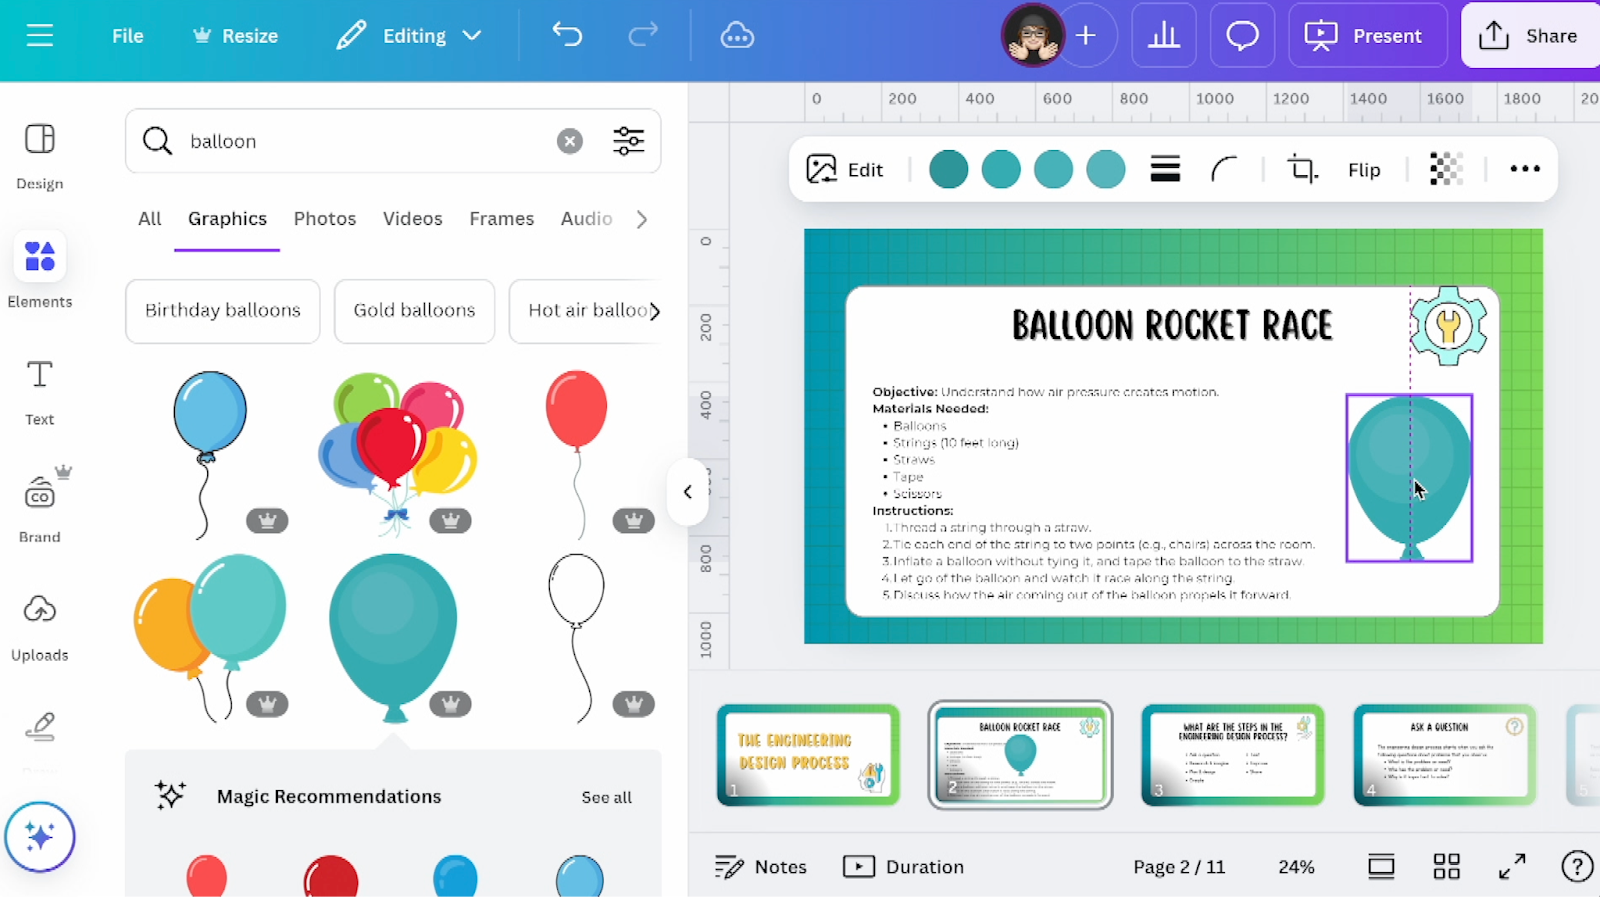
Now to make this a bit more engaging, I’m going to add some balloon graphics. In the toolbar on the left-hand side, I’m going to select “Elements” and then search for balloons. Once, I find one I like, I can just click on it and place it on my design. I can also change the colors of the graphic if I want.
Teaching Material Example 2: Creating an Interactive Learning Experience
Another way I like to use Canva is to facilitate future-focused learning through interactive learning experiences. When you create teaching materials in Canva, you can easily customize and adapt them to fit your students’ needs.
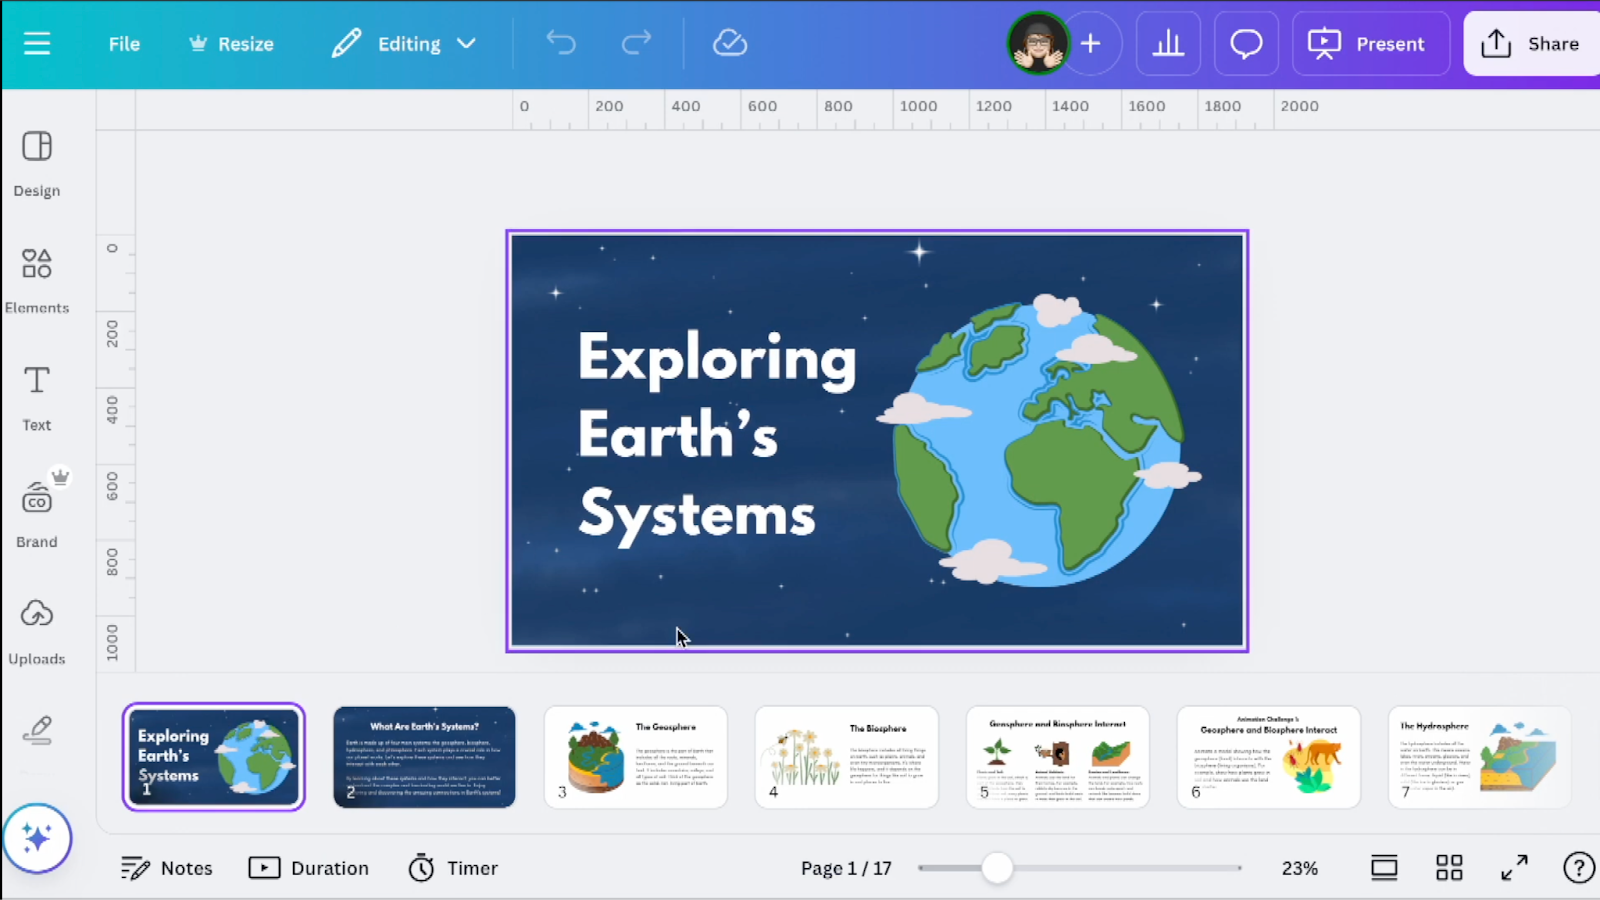
I’ve designed an interactive learning experience on exploring Earth’s systems. Not only does it have reading material on grade level, but it also provides opportunities for kids to create from the knowledge they’ve learned.
Step 1:
First, I’m going to create a blank presentation and follow the same steps listed in Example 1 above.
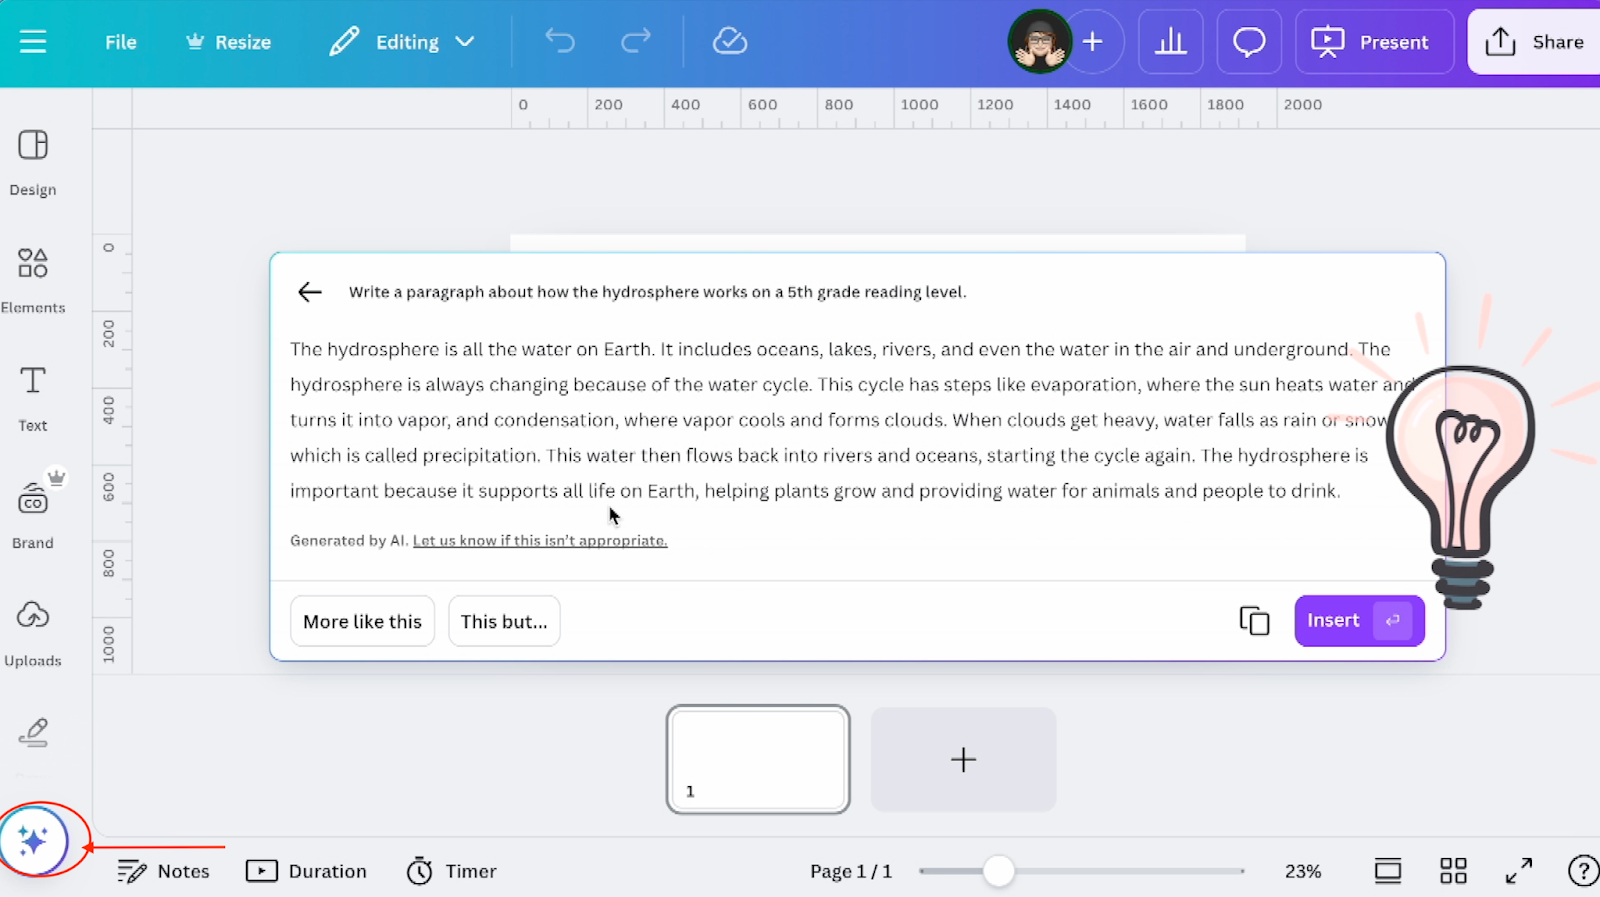
Inside my blank presentation, I’m going to use Magice Write to get started. In the bottom left-hand corner, I’m going to select the star icon. Then select “Magic Write” and enter the prompt “Write a paragraph about how the hydrosphere works on a 5th-grade reading level.”
Here’s what Magic Write generated for me:
Once, I click “Insert” the paragraph will be added to my slide deck and I can customize the text and add a heading to make it more engaging.
Step 2:
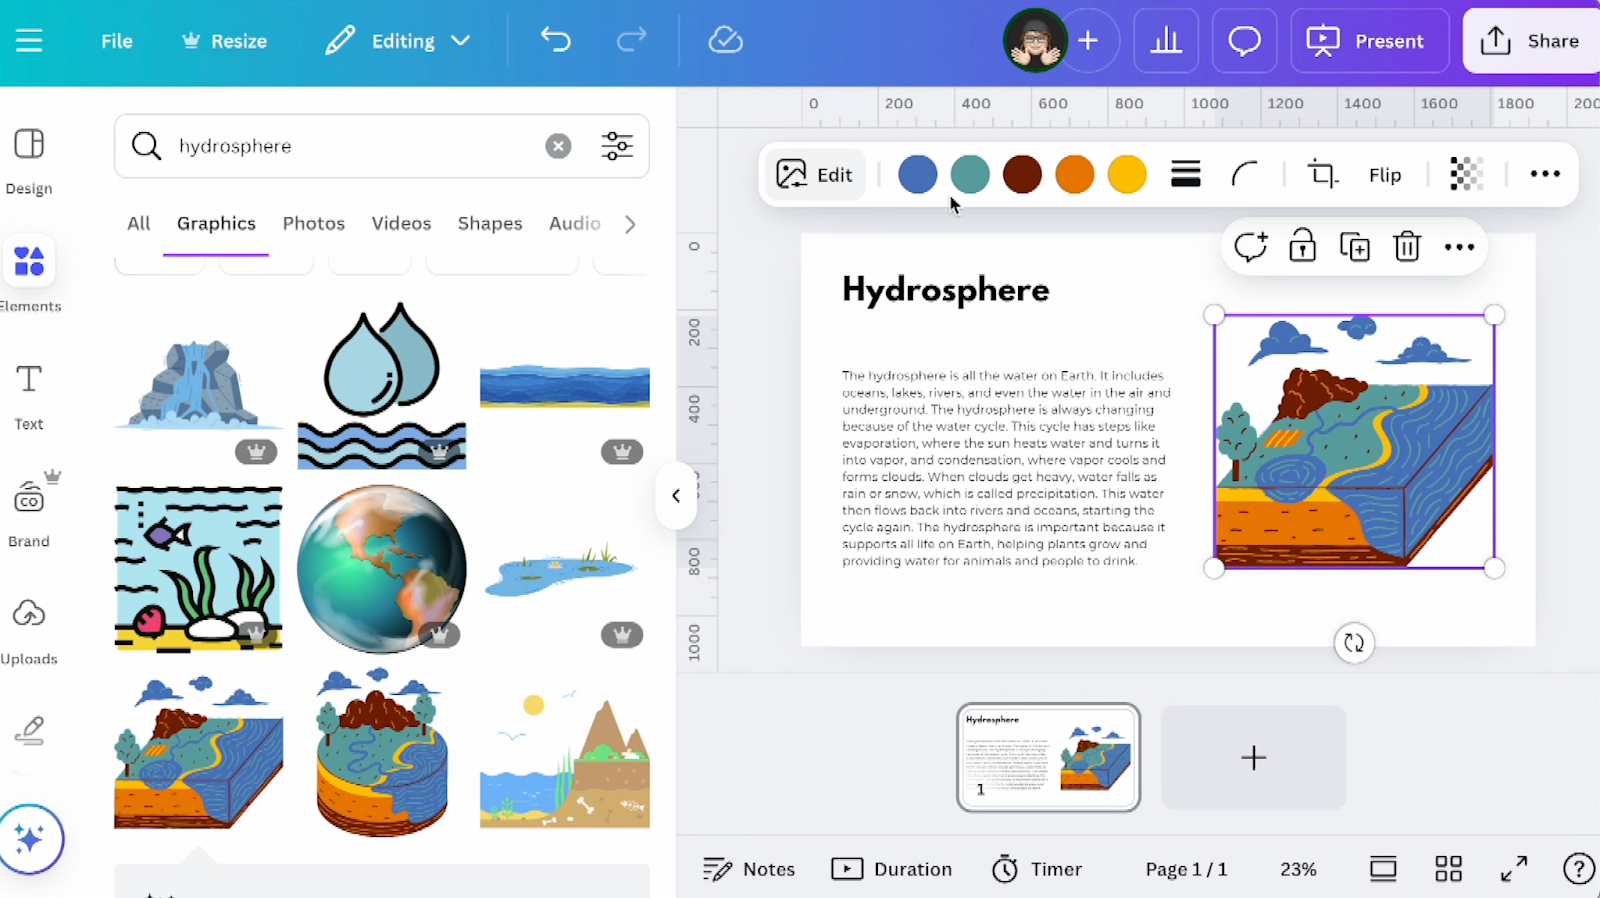
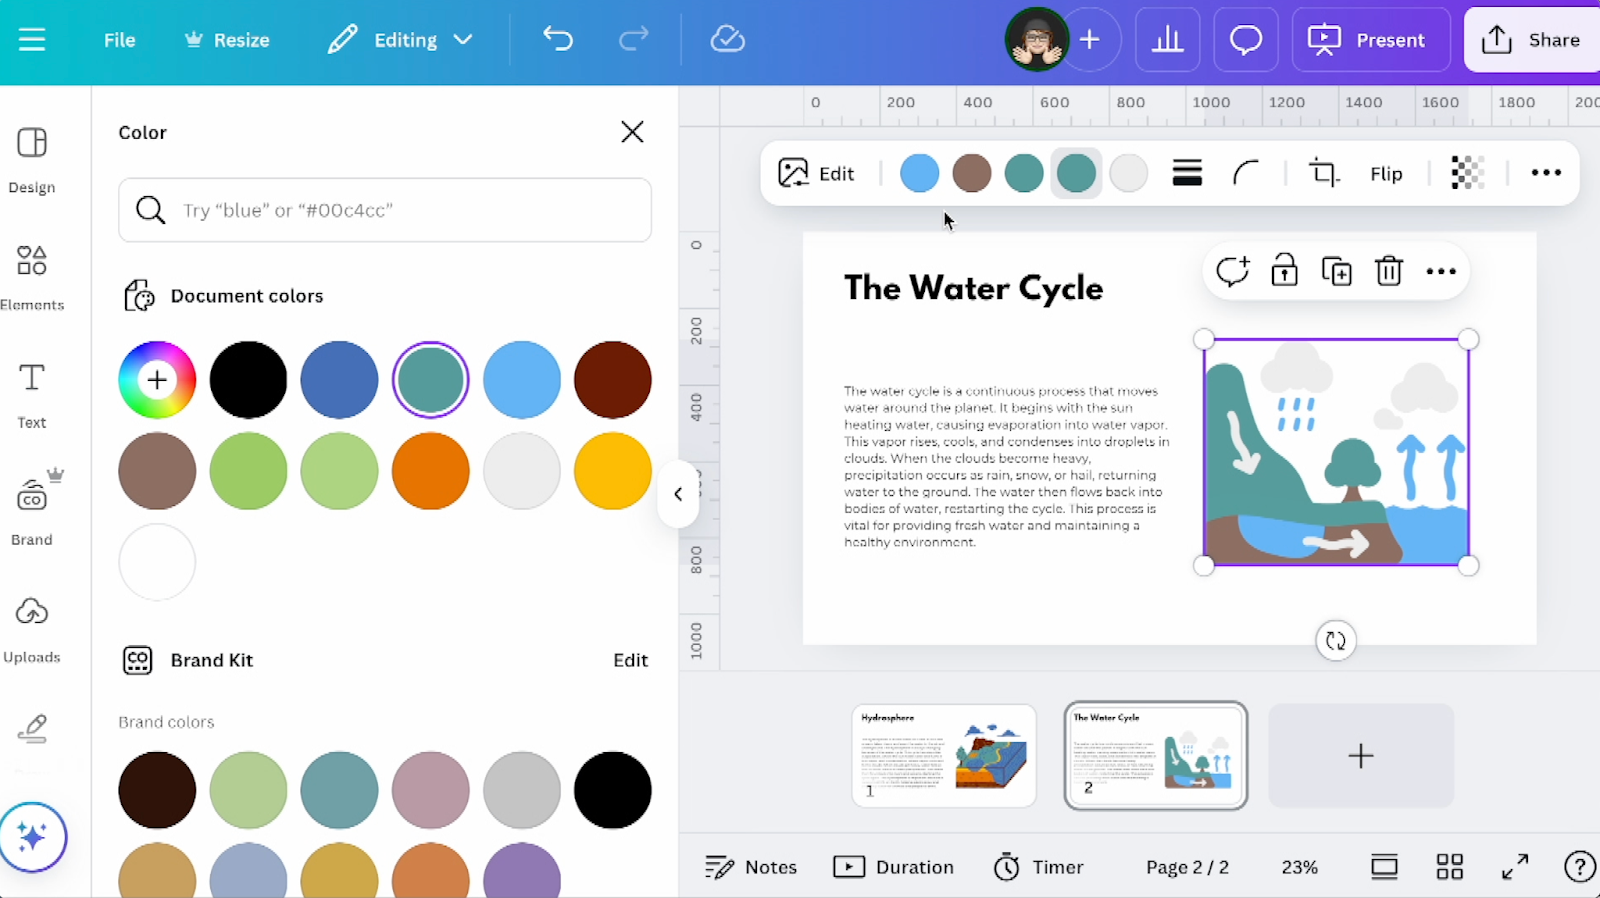
Now it’s time to add some graphics! Again, I’m going to navigate to “Elements” in the left-hand toolbar and search for “hydrosphere”. I’m going to use graphics instead of pictures. Once I find one that I like, I can click on it, add it to my layout, and customize the color.
Step 3:
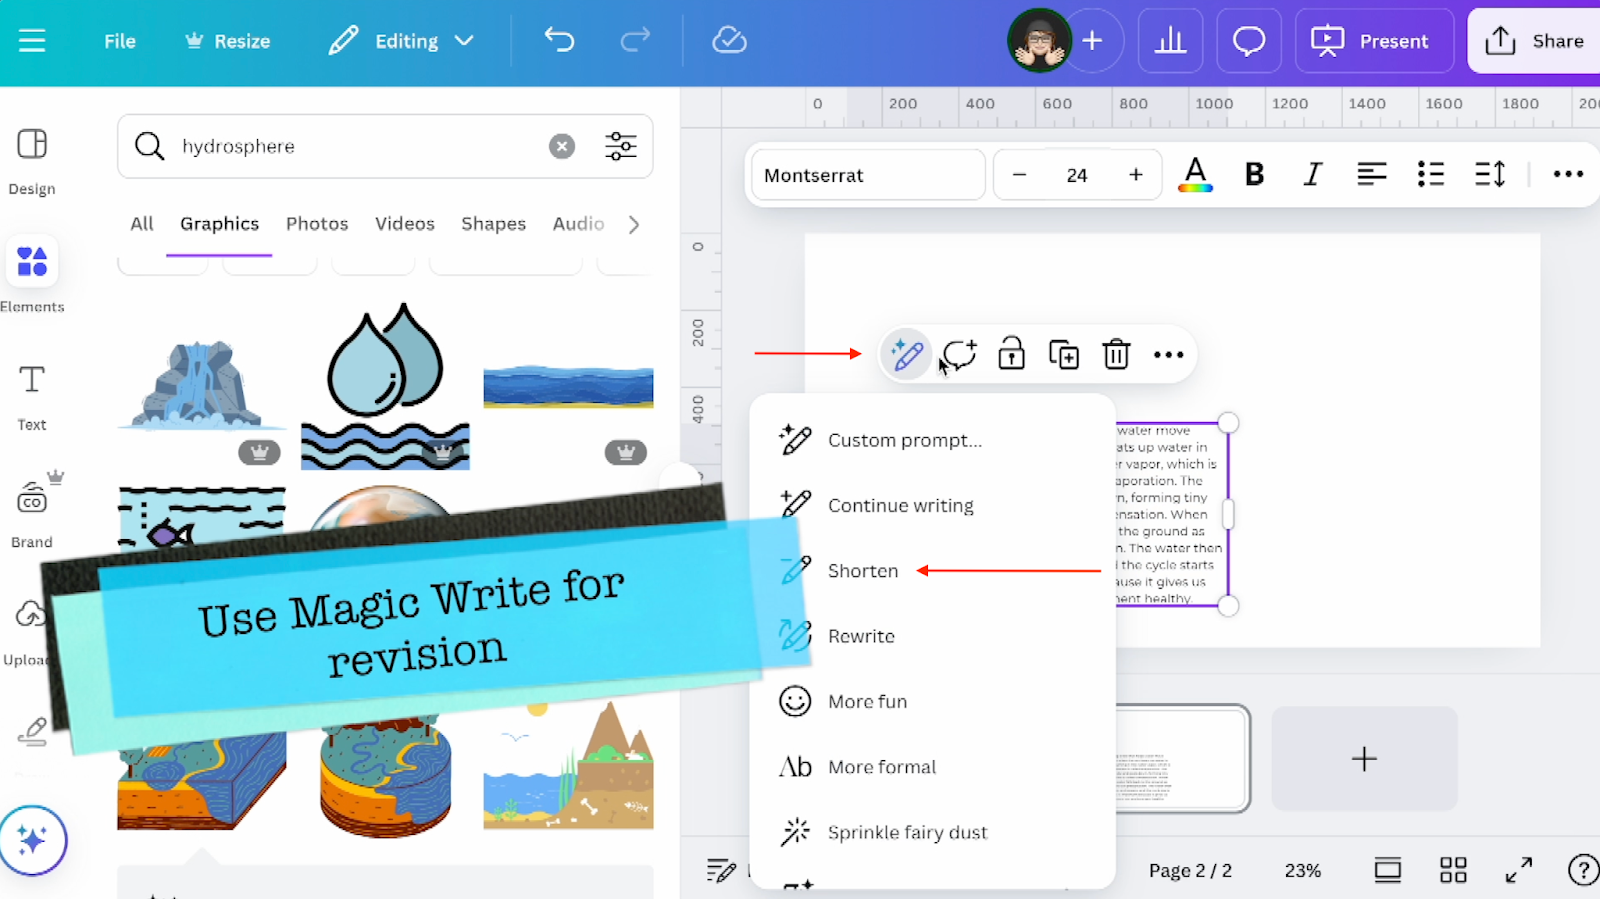
I am going to continue designing this learning experience using Magic Write to draft my content. To do this, I’m going to add a new slide, select the Magic Tools star icon in the lower left-hand corner, and click on Magic Write.
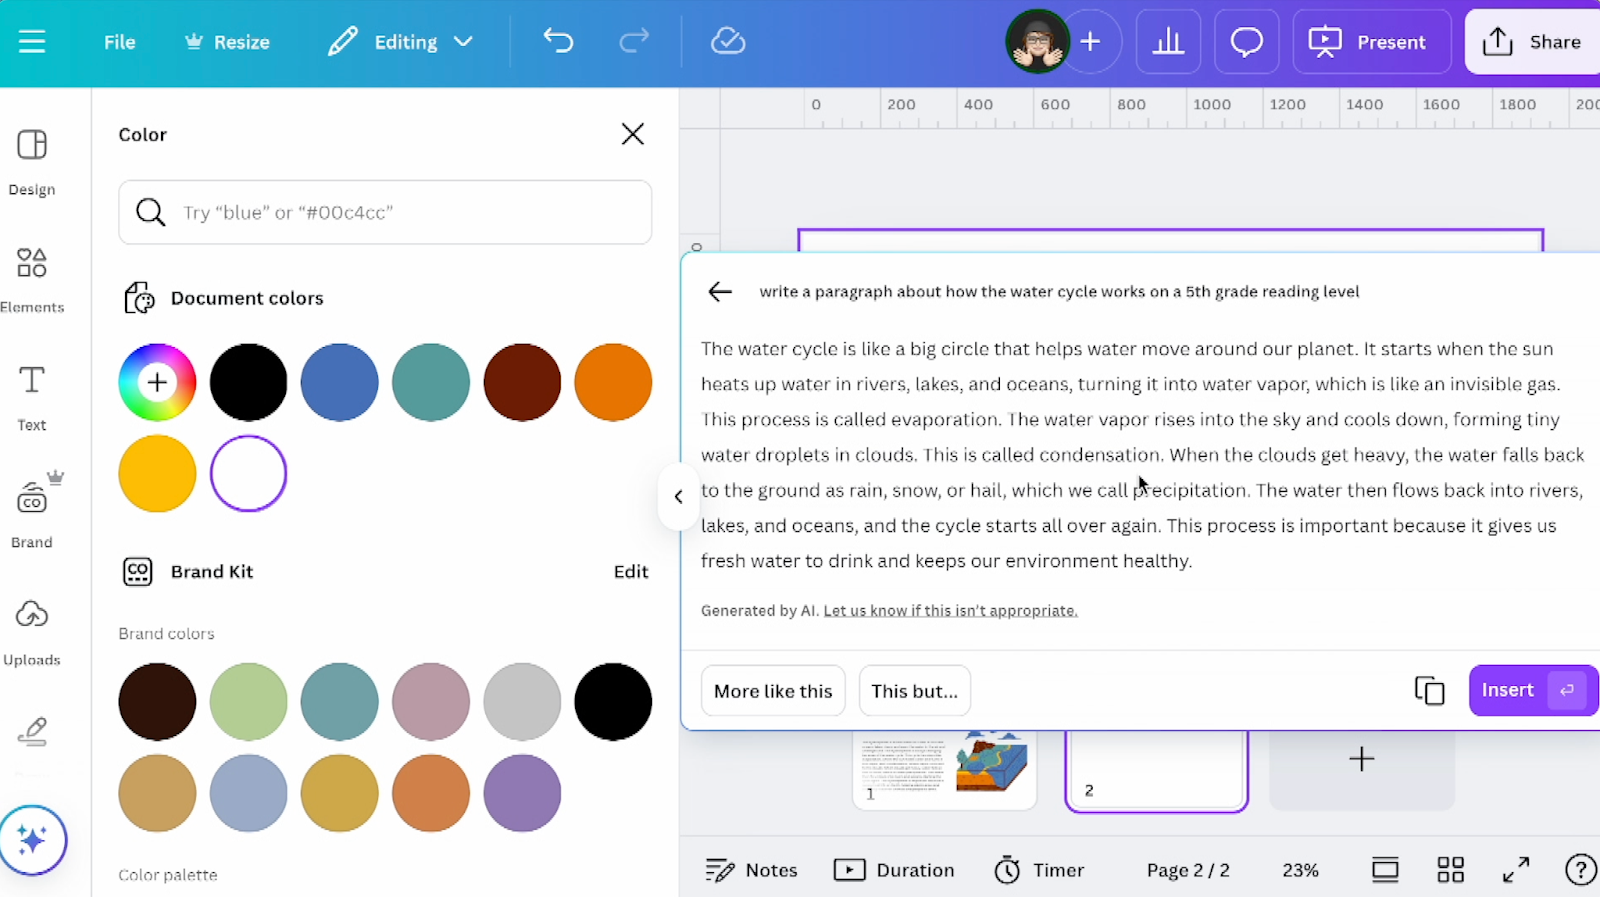
Here is my prompt for the next page: “Write a paragraph about how the water cycle works on a 5th-grade reading level.”
It’s important to continue to add in as much context as possible like “on a 5th-grade reading level.”
Here’s what Magic Write generated for me:
However, the paragraph is a little bit longer than I would like. The great thing about Magic Write is that I can continue to automatically revise what it generates. All I have to do is select the text on my slide deck, click on the Magic Write button (the pencil with the star icon), and select “Shorten”. This will condense the previous paragraph that was generated.
Step 4:
I like to just copy and paste the title format from the first slide onto the second one and switch up the title. Then, I’ll choose a new graphic from the Elements tab. What I typically like to do is try to find graphics that are similar and customize the colors so my design feels consistent.
Step 5:
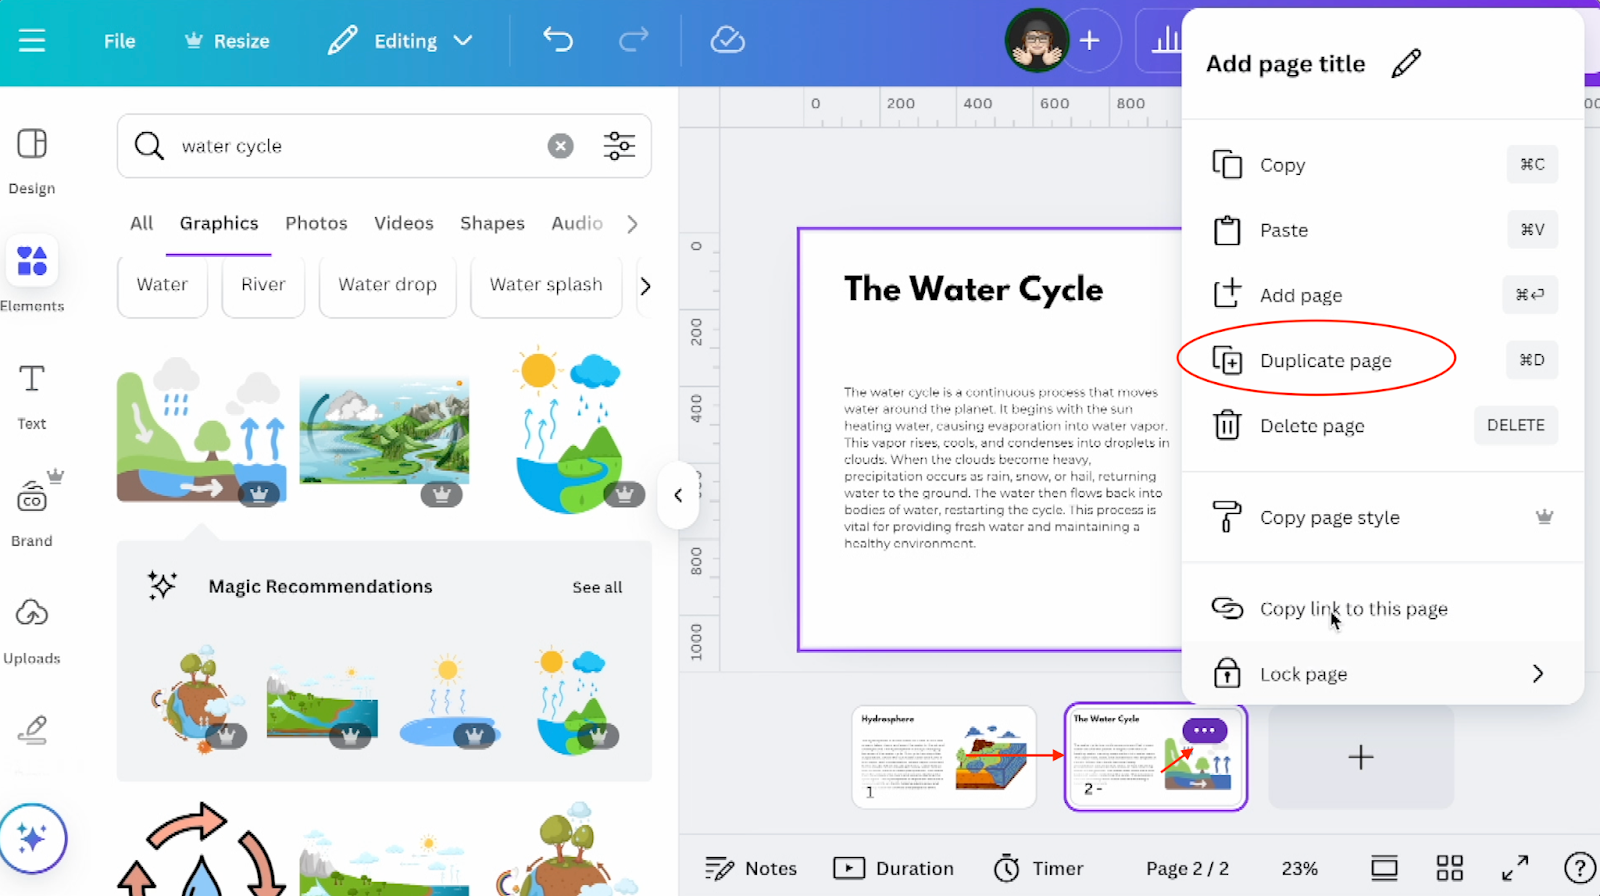
Then, to save more time as I continue building out my learning experience, I will duplicate the page and replace it with the content that I want.
To duplicate a page, select the page, click the three dots in the top right, and select “Duplicate”.
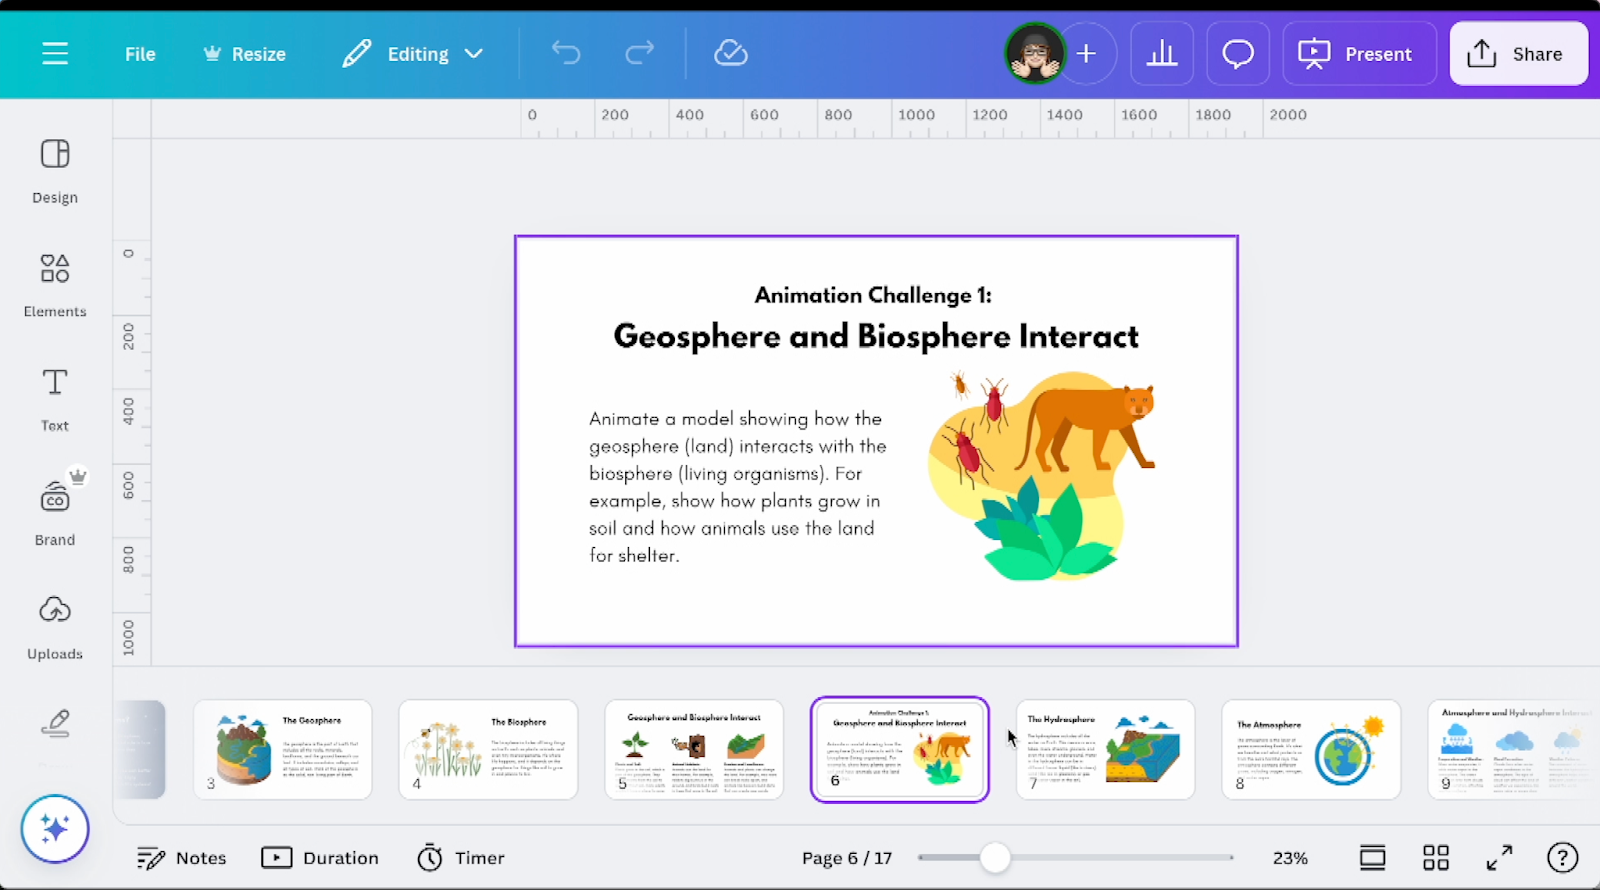
Step 6:
The last thing I did was add some animation challenges to the learning experience. This allows students to easily add a slide and create animations that show their knowledge.
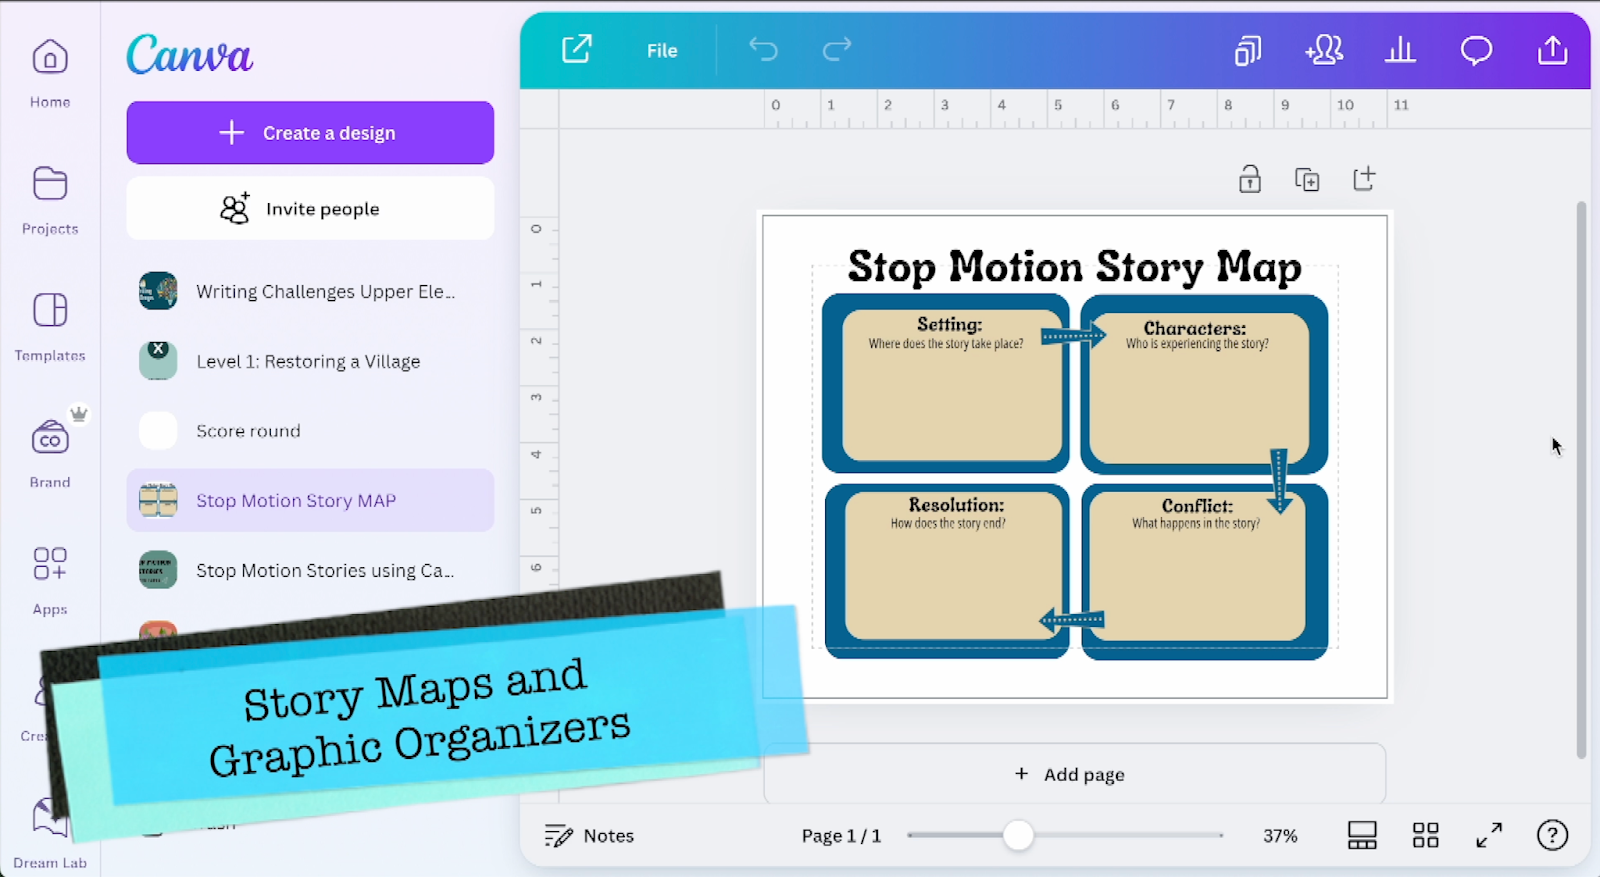
Example 3: Designing Story Maps and Graphic Organizers
I also like to create teaching materials in Canva, such as story maps and graphic organizers, using the wide range of shapes, colors, and design tools available. It’s so fun to design!
Step 1:
To create a graphic organizer, I’m going to navigate to the home page and select “Create a Design”. I can actually search for a graphic organizer to get the right dimensions.

Step 2:
Once you have your design, you can search for a graphic organizer template in the “Design” section on the left-hand toolbar or you can create on from scratch with “Elements”.
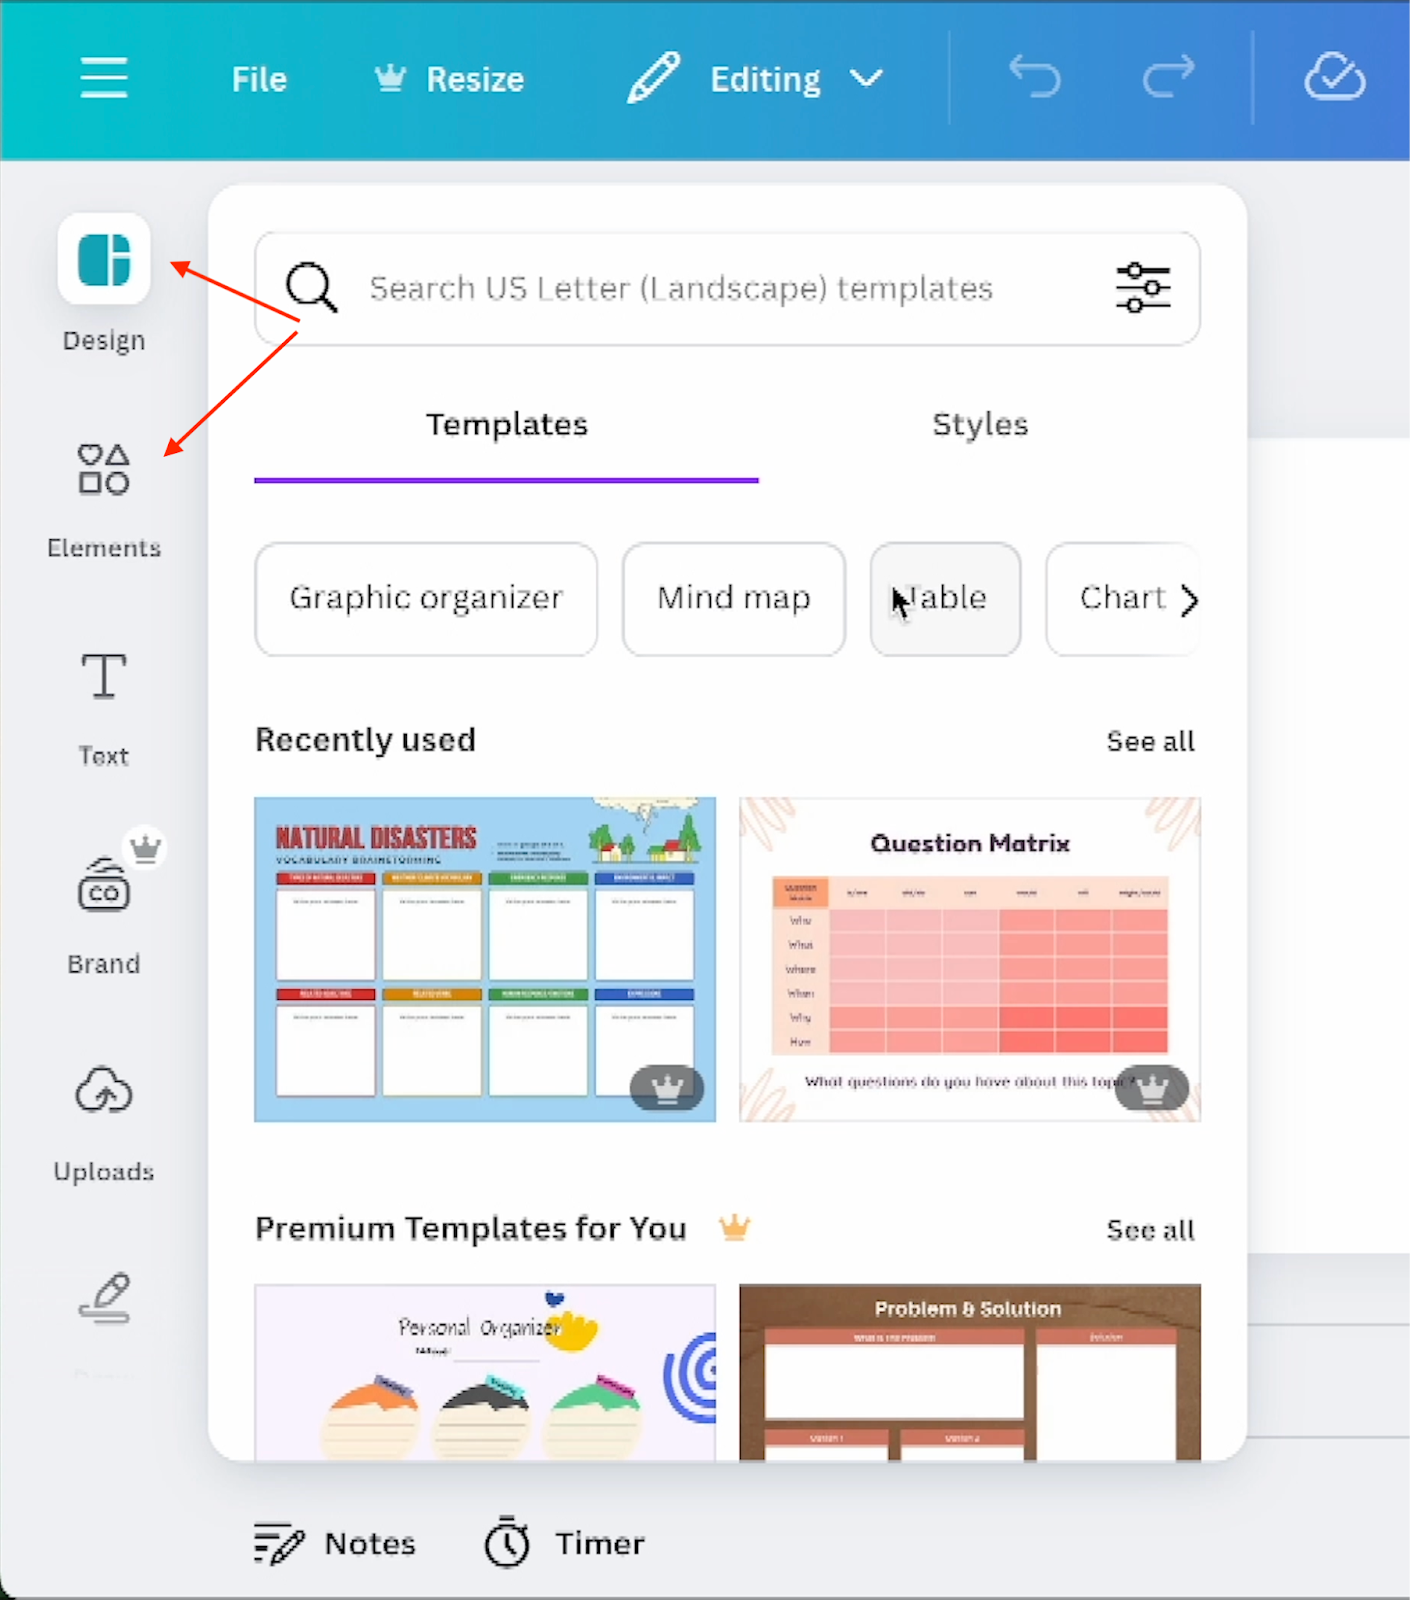
For this example, I’m going to create one from scratch using Elements.
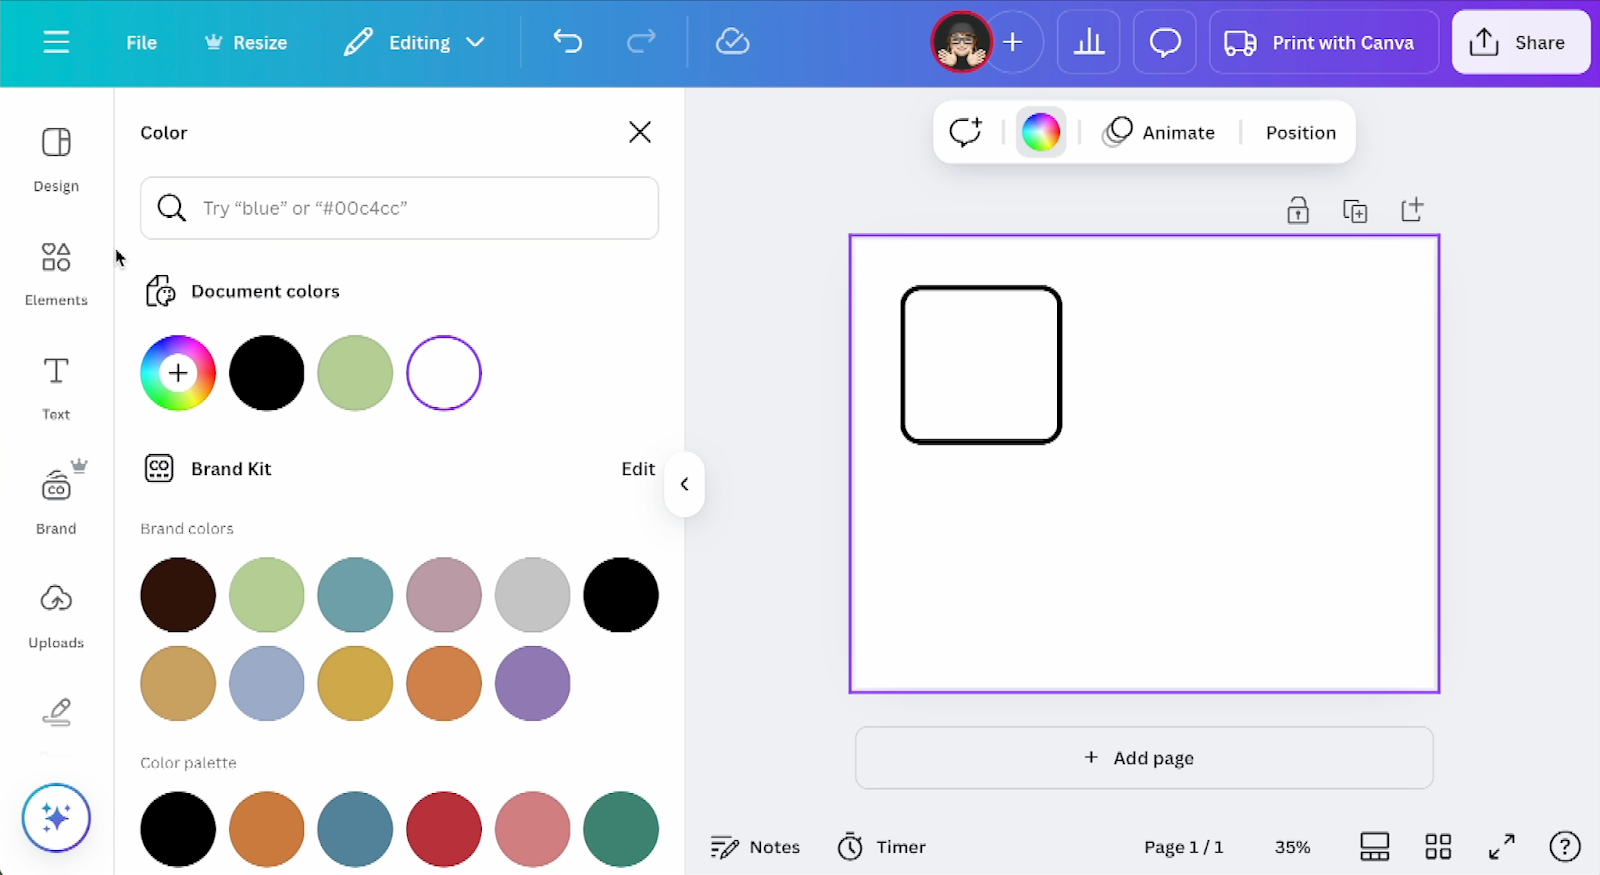
First, I need to create the boxes that you see in the example above. To do that, I’m going to search for a square in Elements (in the left-hand toolbar), add it to my design, resize it, and customize the color.
Step 3:
Now, I’m going to add an arrow from the Elements tab.
Then, I’m going to copy each one of my shapes and move them around until I create the layout like in the example above.
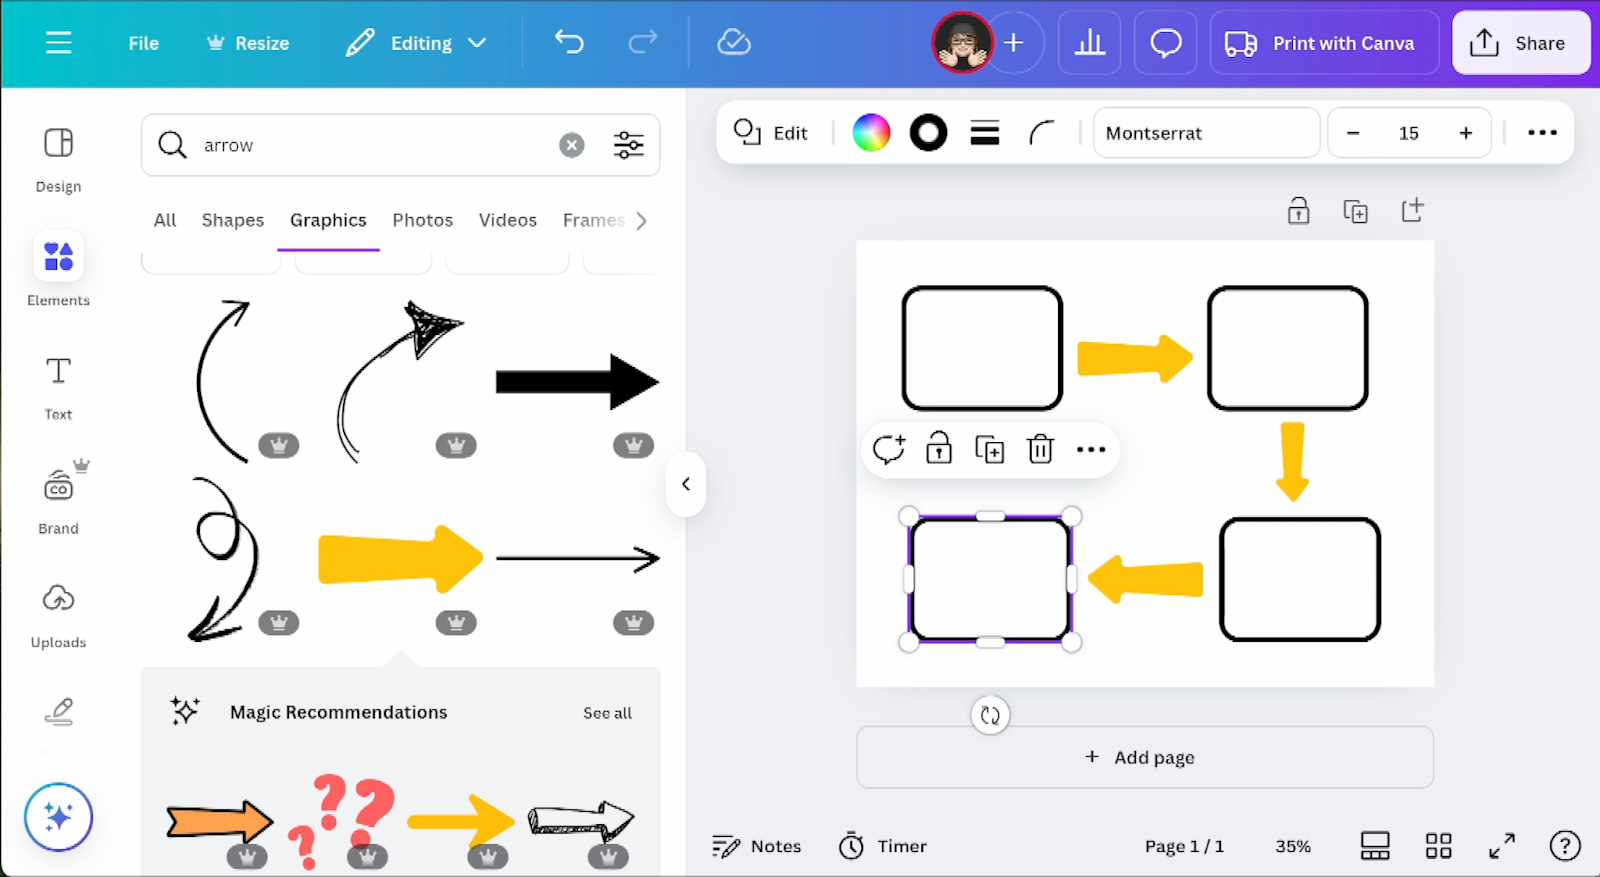
The great thing about Canva is that they have guides that show up when you’re moving objects around to help make sure they are aligned.
This is just my starting template and I can come in here and add in graphics, text, and any other elements.
Canva is a magical tool filled with endless creative opportunities! These are just a few examples of how you can use this tool to save time creating high-quality teaching materials.
I really encourage you to jump into Canva and follow one of these examples or find your own template to customize.
Want more Canva support? Check out our Canva AI Toolkit where we walk you through how to get started with Canva.
As a Canva for Education training partner, we provide training to help your staff learn how to confidently use Canva’s dynamic tools to transform their classroom → https://dforlearning.com/canva-partner
Happy creating!
Watch This Instead

Meet the Creator
Hi, I’m Susan Maynor— learning experience designer, visual storyteller, and champion for creativity in all things education. I help educators dream, design and develop relevant and compelling learning experiences that cultivate creativity, impact community, and ignite original thinking in education. The goal for this site is to help educators discover, design and potentially develop relevant and compelling learning experiences that cultivate creativity, impact community, and ignite original thinking in education.

")
